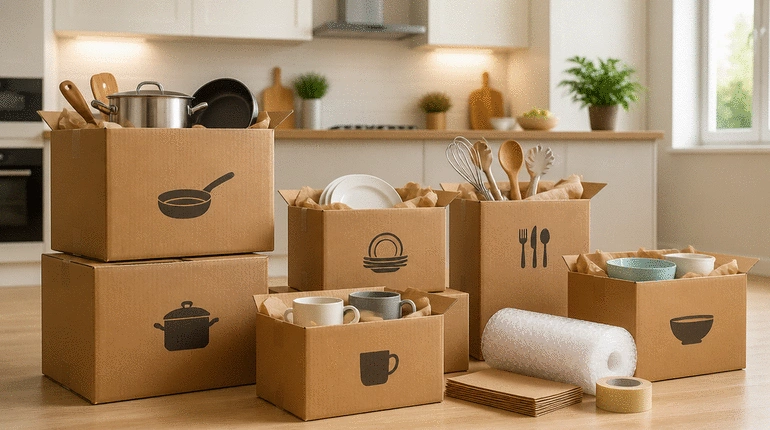
Essential Packing Supplies
- Sturdy cardboard boxes in various sizes
- Bubble wrap for fragile items
- Packing paper to wrap dishes and glassware
- Clear packing tape for sealing boxes

Are you ready to transform your kitchen packing experience from chaotic to organized? With the right strategies, packing your kitchen can be surprisingly manageable and even eco-friendly!
Efficient kitchen packing can streamline your move. Below are key strategies and essential supplies for a successful packing experience.
Packing your kitchen can seem daunting, but with the right materials, it becomes much simpler! Start by gathering essential packing supplies to ensure you're fully equipped. You'll need various sized boxes, packing paper, and sturdy tape. Remember, having quality materials saves you time and keeps your items safe during the move. For more insights on how to pack smart, read our guide on pack smart for your move.
Here’s a quick list of must-have supplies:
At Move Smart AU, we believe in eco-friendly practices—especially when packing! Instead of relying solely on new materials, consider using items you already have. Old newspapers, towels, and blankets are not only great for cushioning but also help reduce waste. By being mindful of your packing solutions, you’re making a positive impact on the environment while moving!
Here are some eco-friendly alternatives to consider:
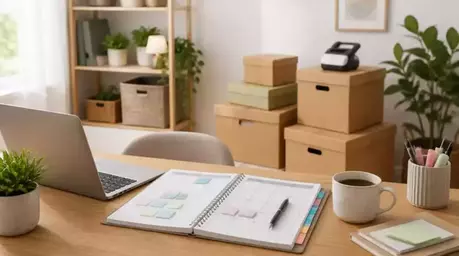
Keeping track of your items while packing can be a game-changer! Utilize digital tools like inventory apps to document your kitchen inventory. Not only does this help in knowing what you have, but it also aids in finding items post-move. I recommend taking photos of your items and noting their condition for easy reference!
Some popular inventory management tools include:
Your kitchen likely has many fragile items, so investing in bubble wrap, packing paper, and a good tape dispenser is crucial! These supplies will ensure that your glassware and dishes are well-protected during the move. When packing, remember to wrap items individually to avoid any breakage.
Here’s a reminder of essential packing supplies to have on hand:
It’s best to start packing those items you use the least! Think about seasonal cookware or specialty gadgets that you rarely touch. By beginning with these seldom-used items, you create momentum and make the later steps easier. I often suggest grouping similar items together, which makes unpacking a breeze!
Consider packing:
Labeling your boxes is key to staying organized during the unpacking process! Use clear, detailed labels that describe the contents and the room they belong in. This simple step can save you a lot of time and frustration once you arrive at your new home. Plus, it’s a great way to ensure nothing gets misplaced! For more simple and effective labeling advice, check out these simple box labeling tips.
When labeling, consider:
To take labeling a step further, implement a systematic approach! You might want to number your boxes and keep a corresponding list of their contents. This helps you quickly locate specific items without having to dig through multiple boxes. A simple spreadsheet can do wonders for your packing efficiency!
Here’s a suggested labeling system:
Don’t forget to create an essentials box filled with the items you’ll need right away! This box should include your basic cooking tools, dishes, and some non-perishable food items. Having these essentials readily available will help you feel settled and reduce stress as you adjust to your new space.
Essential items to include might be:
Your first night in a new home can be busy, so consider preparing a first night box! This box should contain everything you'll need for an easy evening, like snacks, pajamas, and personal hygiene items. By having this box packed separately, you can avoid scavenging through boxes to find what you need.
Here’s what you might want to include in your first night box:
Packing fragile glassware and stemware requires extra care! Wrap each piece individually in bubble wrap or packing paper, and place them in a sturdy box with dividers for added protection. This ensures they won't clink together and break during transit. Remember—safety first!
Best practices include:
Did you know that packing plates vertically reduces the chance of breakage? Instead of stacking them flat, place plates on their side, just like records! Use bubble wrap or packing paper in between each plate for added cushioning. This method helps distribute weight evenly and keeps your dishes safe.
Here are some tips for packing plates:
Small appliances require a different packing strategy. Before packing, make sure to clean them and remove any detachable parts. Wrap them securely in bubble wrap and store them in their original boxes if possible. If you don’t have their original boxes, use sturdy containers that fit snugly.
Consider these packing tips for small appliances:
Investing in dish pack boxes can make a big difference when moving fragile kitchenware! These boxes are designed specifically for packing dishes and glassware securely. They come with dividers, which help keep your valuables in place. This extra layer of protection is invaluable during your move! For additional advice on protecting delicate items, explore our comprehensive guide on packing fragile items for moving.
Benefits of using dish pack boxes include:
When it comes to moving perishables, timing is everything! To ensure they stay fresh, pack your fridge items last and transport them in an insulated cooler. If you have long distances to travel, consider using ice packs or dry ice to keep items cold. This way, you can be sure your food arrives safely!
Tips for transporting perishables:
Packing pantry items can be straightforward, especially non-perishables! Group similar items together, and seal them tightly to avoid spills. I suggest using smaller boxes for heavier items, as this makes them easier to handle and reduces the risk of boxes breaking!
Consider these packing tips for your pantry:
If your move involves crossing borders, familiarize yourself with customs regulations! Different countries have specific rules regarding food items, so it's best to research what can and can't be transported. This helps avoid any unnecessary delays or issues during your move!
Key considerations include:
Using food storage containers for packing food items is a smart choice! Containers help keep everything organized and prevent spills. Choose containers with airtight seals to maintain freshness during transit. It’s also a handy way to transport your items without needing to repack once you reach your new home!
Consider these benefits of food storage containers:
Moving in a hurry? No worries! A 48-hour rush packing plan can help you stay organized and efficient. Start with a timeline to break down tasks into manageable steps. By setting clear goals, you can tackle packing without feeling overwhelmed!
Here’s a suggested packing timeline:
Using a zone-based packing approach can significantly speed up your packing process! Divide your kitchen into zones and tackle one at a time. This method helps you focus and prevents confusion about where items belong.
To create your checklist, include:
Finally, having a moving checklist can keep you on track! This checklist should encompass all the tasks you need to complete before your move. By checking off each item, you can ensure nothing is forgotten and feel confident as your moving day approaches!
Consider adding these items to your moving checklist:
To streamline your packing process, consider creating a detailed packing plan before you start. This plan should outline which zones to tackle first, what items are essential for immediate access, and a timeline for completing each step. A well-thought-out plan not only saves time but also reduces stress, allowing you to focus on settling into your new kitchen with ease!
Unpacking can sometimes feel just as overwhelming as packing, but with a few smart strategies, we can make it a breeze! The kitchen, being the heart of our home, deserves special attention during this process. My goal is to help you set it up efficiently so you can dive right into cooking and enjoying your new space.
First things first, let’s think about how to set up your kitchen for optimal functionality! Start by unpacking the essentials—like your cookware, utensils, and dishes—first. This allows you to ease into your new kitchen without feeling stressed. Plus, it helps make mealtime simpler during those initial days!
Avoid common unpacking mistakes like scattering items all over the kitchen or leaving boxes unopened for too long. When you unpack, focus on one area at a time, and try to keep similar items together. This approach not only saves time but also helps reduce the chaos, making the process feel more manageable.
One common pitfall is not having a plan before diving into unpacking. Without a clear strategy, you might end up moving items back and forth unnecessarily! To avoid this, outline a layout for your kitchen based on how you cook and use the space.
Another mistake is neglecting to check for any damaged items. Inspect your belongings as you unpack and make a note of anything that might have been broken during the move. Reporting damages early on can save you from headaches later!
Having an organized kitchen right from the start makes it so much easier to settle in. Try to create zones based on your cooking habits, such as a baking area, cooking zone, and food storage section. Consider these tips:
When it comes to unpacking, you might wonder whether it’s worth it to hire professionals or go the DIY route. Evaluating professional packing services can provide peace of mind, especially if you have fragile items or large appliances. However, if you’re on a budget, there are plenty of affordable DIY packing tips you can use to make the process smoother.
Hiring professional movers can be a huge relief, especially if you’re feeling overwhelmed. They often come with experience and strategies that can save you time. But, it’s essential to consider your budget and whether you have the resources available for this option.
If you decide to tackle the unpacking yourself, here are some cost-saving DIY packing tips:
Don’t underestimate the power of a helping hand! Inviting friends or family over to help unpack can turn a daunting task into a fun day. Just make sure to have snacks and drinks ready to keep spirits high!
Visual aids can make a big difference when unpacking. Incorporating infographics and visual checklists can help guide you through the process. Having a visual representation of your unpacking plan can keep you organized and motivated.
Consider creating a checklist of everything you need to unpack within the kitchen. Visuals can serve as both a plan and a reminder of what needs to be done next—keeping your unpacking process on track!
Watching a quick video on kitchen organization can provide you with fresh ideas! Perhaps explore resources on Move Smart AU; there are plenty of techniques out there that can inspire you as you settle into your new kitchen.
Hearing from others who have successfully navigated their kitchen unpacking can be incredibly helpful. Including quotes from professional movers can offer insights into best practices and help you feel more confident about your own unpacking journey.
Professional movers often share valuable advice about unpacking efficiently. For example, they might suggest, “Always start with the kitchen—it’s the heart of the home!” This simple tip can set a positive tone for your entire unpacking process!
Real-life experiences often resonate and provide encouragement. Have you had a memorable unpacking moment? Sharing your own stories can create a sense of community and connection with others who are moving.
Lastly, I invite you to join the conversation! Sharing your packing tips not only helps others but can also provide you with new insights from fellow movers. Community interaction enhances our moving experience and can make the process less isolating.
What was your best packing tip? Did something work especially well for you? Sharing your insights can inspire others and build a supportive network of movers!
Don’t forget to check out Move Smart AU’s resources for more packing and unpacking tips! We’re here to support you every step of the way, making your move as smooth and eco-friendly as possible! If you're looking for ways to responsibly dispose of unwanted items, our guide on choosing rubbish removal in Sydney offers valuable information.
Here is a quick recap of the important points discussed in the article:
